Shadcn Ecommerce Template: Five Screens That Work on Phones
If you search for a shadcn ecommerce template, you get three kinds of results: hosted store starters that come with a commerce backend, paid front end kits, and directories that list a handful of GitHub repos. What the lists rarely tell you is which of those you can point at your own products API, and what the cart and the product page do when the buyer is on a phone. This guide walks through the five screens a storefront needs, built from shadcn-style source components that you install into your own Next.js app, and compares that route with the hosted starters.
What screens does a shadcn ecommerce template need?
Five, and they share one product and cart shape:
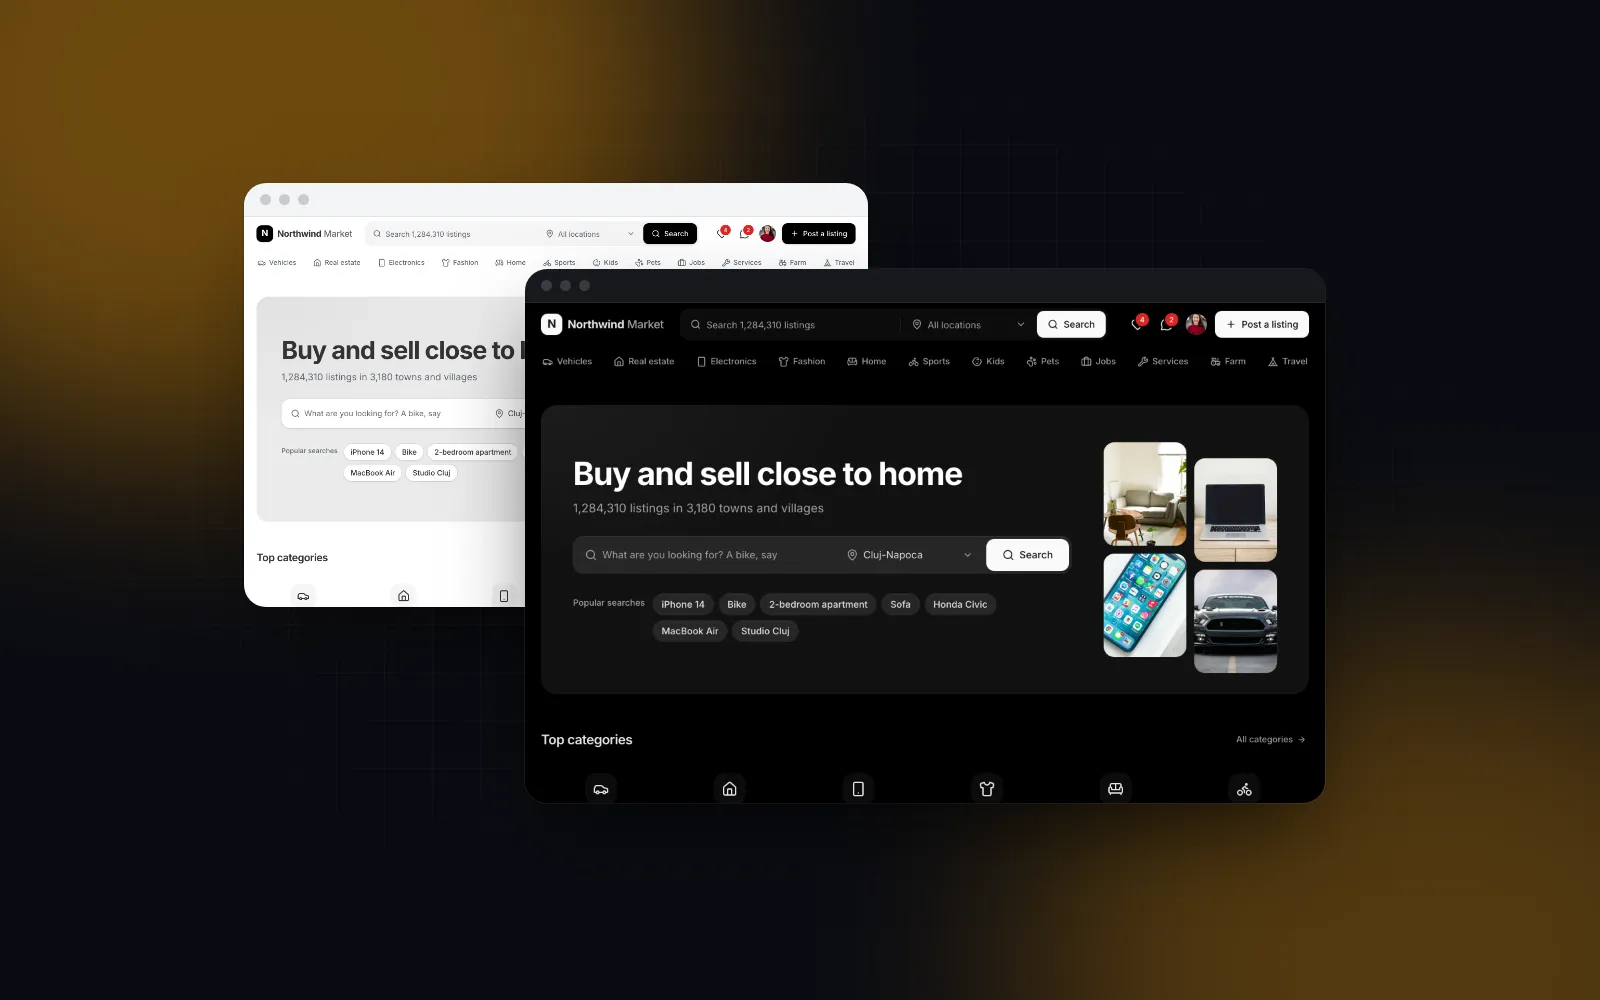
- Home. A search field, category tiles and a rail of featured products.
- Search and category results. Filters, sort, a grid or list and a result count that follows every change.
- Product page. Photos, price with the sale price, an add to cart control, description and reviews.
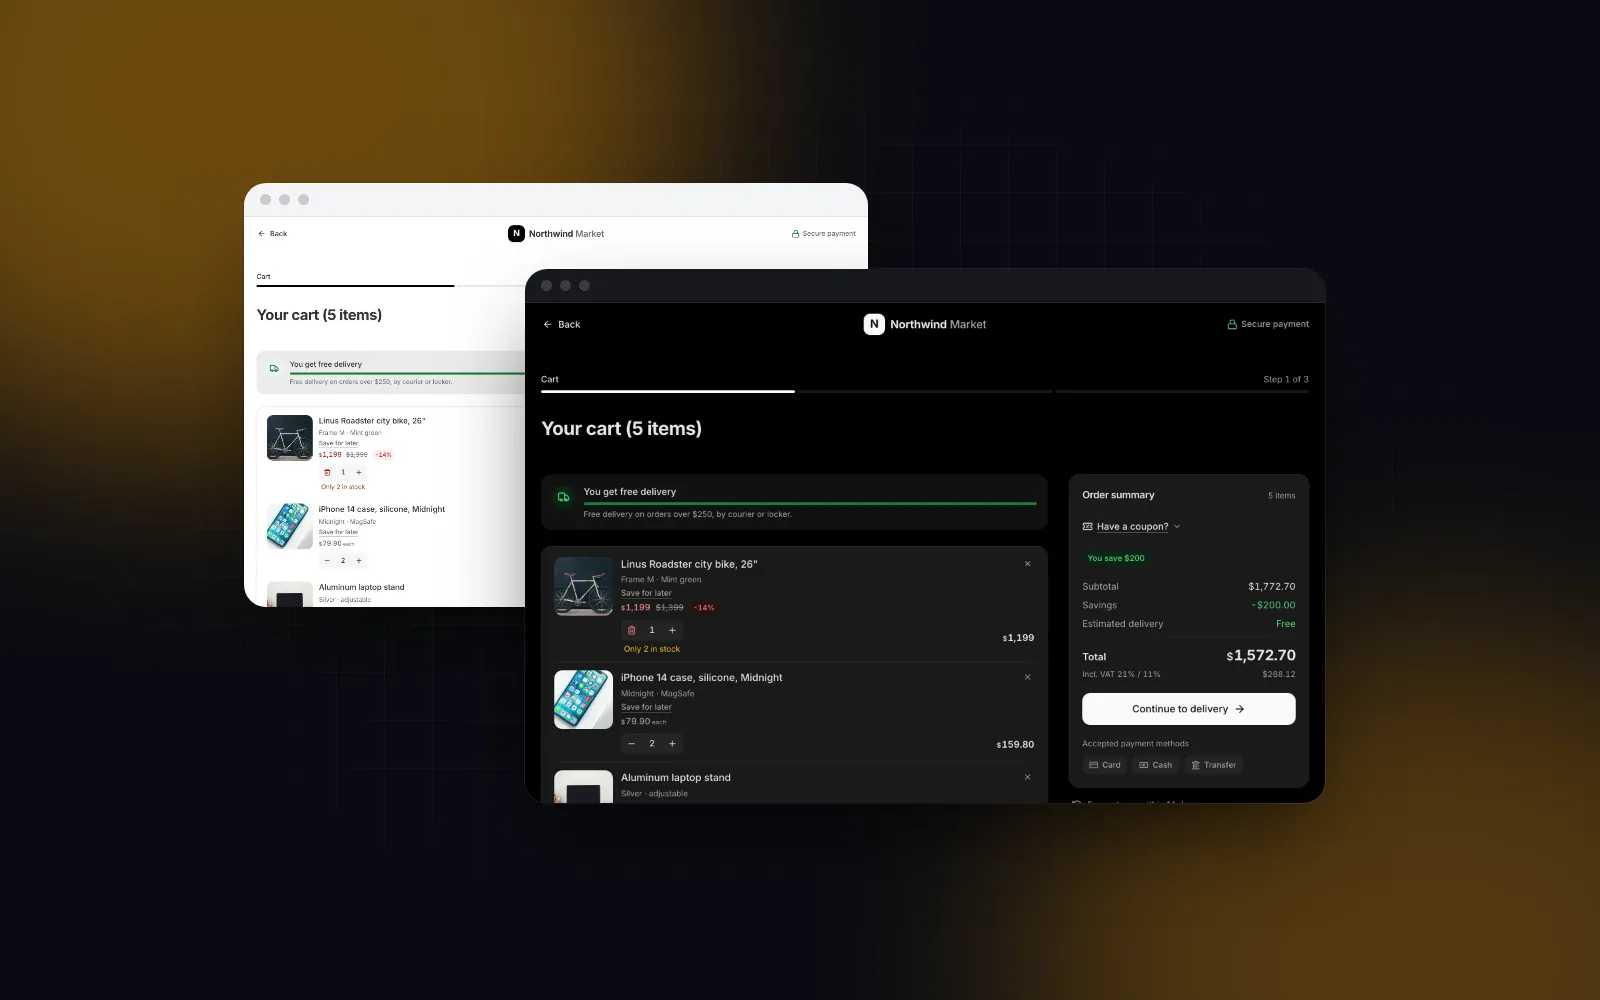
- Cart. A drawer you can open from any page, with quantities, removal, a promo code and totals.
- Checkout. Address, delivery, payment, review and a confirmation.
Here is how those map to Wingo UI, the shadcn-style library we build. There is no single shadcn store template in the catalog. You get shadcn ecommerce blocks for whole screens and the 16 components of the commerce category for the parts in between:
The marketplace blocks started as a classifieds kit, so they speak in listings and sellers. That fits a multi-vendor store directly. For a single brand you keep the home and search blocks, edit the sample categories, and build the product page from components, which is what the next sections do.
Should you use a template or a hosted commerce starter?
It depends on who owns the backend. A hosted starter gives you products, inventory, checkout and an admin on day one, and the storefront code is written against their API. A front end template gives you screens and leaves the data to you. These are the options that show up for this search, checked on November 6, 2026:
Your Next Store is the better pick when you want to sell this week and you are fine with their platform: it is actively maintained (pushed November 5, 2026) and the storefront is open source. Its hosted plans on yns.store (opens in a new tab) start with Starter at $25 a month billed yearly or $30 billed monthly, and list 0% transaction fees, so you pay Stripe's own fees only. Relivator is useful to read for a full stack with auth and a database, but it trails the current Next.js release. A front end kit makes sense when you already run Shopify, Medusa, Saleor or your own API and you want the screens to behave well on a phone. That last case is where the rest of this guide sits. Our roundup of shadcn templates covers more categories than commerce.
How do I build the product page from components?
Start with a cart that every page can read. The cart lines use the CartItem type the Cart Drawer exports (id, title, price, quantity, plus optional image, variant, compareAtPrice and maxQuantity), so the product page, the drawer and the checkout all pass the same objects around.
The product view puts the gallery next to the buy box. The Quantity Stepper with addToCart starts as an "Add to cart" button and turns into a stepper once the product is in the cart. Because its value comes from the cart, the stepper on the page and the one in the drawer always agree.
fit="contain" letterboxes product shots on white in light mode, which is what you want for packshots, and bleedOnMobile drops the radius below md so the photo runs edge to edge. Give each image a width and height so the full screen viewer takes its shape before the file loads.
$ npx wingo-ui@latest add product-galleryThe stock prop caps the stepper and shows a low stock hint at or below its threshold. This view only updates the client cart. To save the line on the server, return the request from onValueChange: the stepper shows a spinner until the promise settles and rolls back with a message if it rejects, the same contract the drawer uses below. Add Reviews under the buy box when you have them; it takes your review data and renders the summary, filters and the list.
How does the cart drawer behave on a phone?
On a laptop it slides in from the right. Below that, it rises as a bottom sheet with a handle: drag it down, tap outside or press Escape to close it. Each line can be swiped left to remove, and the removed line folds into a row with Undo and a five second countdown. The summary folds to the total with a Details toggle, so the lines keep most of the sheet.
Mount it in the header so it opens from every page. The drawer shows a new quantity at once and waits for your promise; if the server refuses, the line goes back and the error message prints under it.
pricesIncludeTax={false} adds the 8% sales tax on top as its own row, the US way; leave the default true for VAT markets where shelf prices include tax. The tax row is labeled "VAT 8%" by default, which is why labels.tax renames it. The default trigger is a bag button with a badge that bounces when the count grows.
$ npx wingo-ui@latest add cart-drawerHow does the checkout fit in?
The Checkout Page block takes the same CartItem[] lines, so the drawer's Checkout button can lead straight into it. It owns three stages (cart, checkout, confirmation) and four steps inside the checkout (address, delivery, payment, review). Below 1024px the cart stage shows a sticky bar with the total and Continue whenever the summary button has scrolled off screen, and on phones the checkout runs as a full screen flow.
Two defaults matter before you wire it. Every data prop you leave out falls back to the demo data: the sample coupons, two San Francisco addresses, UPS and FedEx rates, test cards and a demo email. And the checkout steps default to Romanian address and tax ID rules (6 digit postal codes, the CUI check), so a US ZIP code fails until you set the country through UIProvider defaults. The page passes the shop data in and keeps the cart in the shared context, so the header badge empties after an order too.
app/(shop)/checkout/page.tsx stays a server component that loads the shop data and renders <Checkout {...shop} />. A rejected onPlaceOrder shows its message on the review step and keeps everything the buyer typed. Our React checkout page tutorial covers the coupon check on the server, renaming the company fields for US tax IDs and the confirmation in detail.
$ npx wingo-ui@latest add checkout-pageCan the marketplace blocks run a single-brand store?
Yes for home and search, with edits. The Marketplace Home Page gives you the hero search, category tiles that link to /search?cat=…, a swipeable promoted rail and a grid of new items. Two parts are regional. The location field in the hero lists Romanian towns from lib/ro-locations, and the New listings grid filters by the default town, Cluj-Napoca. For a brand store, turn off what you do not need with showRecent, showApp and showTrust, pass your own categories and promoted, and write onSearch to route to your search page. No prop hides the location field, so remove it from the installed file or point its import at your own list. The search block keeps the whole search in the URL and gives you facets with counts; the React marketplace template tutorial wires it up step by step.
The Listing Detail Page is a different story. It is built for classifieds: a seller card, Send message, Show phone, a map with the approximate area and a report dialog. There is no add to cart action, which is why the product page above uses components. If you run a multi-vendor marketplace where buyers contact sellers, it is the right block as is. Every block installs as source, so you can also edit it into a product page if you prefer its layout.
What does each screen do on a phone?
This is the part that a desktop screenshot of a template does not show you, so here is each screen below 768px or 1024px, as the components ship:
All of these shadcn ecommerce components respect reduced motion: springs turn into fades. For the safe area, tap highlight and keyboard fixes that apply to any storefront, our list of fixes for a web app that feels native goes through them one by one.
Where do you go from here?
If you want a running store without building a backend, start from Your Next Store. If you already have products in Shopify, Medusa, Stripe or your own database, a Next.js shadcn ecommerce template built from source components is the shorter path to a storefront that holds up on a phone. Try the demos above first. The commerce blocks and components in this post are Pro; a free Wingo UI account installs the free basics they build on, so you can test the CLI in your app before you pay. The Build category has the other screen by screen guides, and the Next.js admin dashboard tutorial covers the back office your store will need next.
FAQ
Is there a free shadcn ecommerce template?
Yes. Your Next Store and Relivator are both MIT licensed on GitHub. As of November 6, 2026, Your Next Store needs an API key from its hosted commerce platform, and Relivator was last pushed on October 4, 2025 and runs on Next.js 15.3, so check both against your stack before you clone one.
Does shadcn/ui have ecommerce components?
As of November 2026, shadcn/ui ships general primitives such as buttons, dialogs, sheets and forms, plus login, signup and sidebar blocks, but no cart, product gallery or checkout. Those come from third party registries and templates that follow the same copy-the-source model, including Wingo UI's commerce category.
Can I use a shadcn ecommerce template with Shopify, Medusa or Stripe?
A template that is only a front end can, because you write the data calls yourself. The Wingo UI blocks take the cart lines as props and report changes through callbacks such as onItemsChange and onPlaceOrder, so the backend behind them can be any API. Hosted starters are tied to their own platform.
What should a store cart do on a phone?
Open as a bottom sheet you can drag down, let people swipe a line away with an undo, and keep the total and the checkout button in view. The Wingo UI Cart Drawer does all three and folds its summary to the total with a Details toggle so the lines keep the room.
Are the Wingo UI ecommerce blocks free?
No. The checkout page, cart drawer, product gallery and marketplace blocks are Pro ($8 a month, $80 a year or $150 once). The basics they are built on, such as Button, Dialog, Card and Badge, are free with an email only account. Pro comes with a 14-day refund that applies only while no Pro item has been downloaded.
- Ecommerce
- shadcn
- Next.js
- Mobile UI
- Templates